This page is a copy of a post on the Plunder Pirates Forum by "Dark Zero"
The Art of the Snipe
The strategy that most players use for Chest Farming is dropping their Pirate Rank to 1 and searching for exposed Pirate Halls, the further away from defenses the better. (Note: There are some players that VEHEMENTLY oppose intentionally Rank dropping. I am not one of them). The matchmaking is fixed according to your own Pirate Hall level so you will only be matched with those that are 2 levels lower than yours or 3 levels higher. Gone are the days when you could pick on the brand new PH1’s.
Exposing your Pirate Hall is also a good way to protect your loot when farming as Chest Farmers will most likely just snipe your PH and not attack your village. This gives you a free Shield and you also keep your loot. However, if you have a lot of loot up for grab and an easy village to raid, some players will still go in and try to steal your resources. Usually though a nice Chest Farmer will see you first and give you a Shield.
The primary objective for Chest Farming is dropping as few units as possible to reduce wait times while getting at least 1 Star, usually from an exposed Pirate Hall. Dropping 1 or 2 Gunners is preferred however it depends on the Gunners level, if they’re lower you may need to drop 3 or more Gunners so you can destroy the Pirate Hall in time.
Sometimes the Pirate Hall isn’t nicely tucked away in a corner but it’s on the outside of the defenses. This is why most Pirate Hall sniping involves using Gunners, you want to be able to out-range the defenses that are near there. Gunners Range can be Maxed out (5) at Tier 5 in the Academy.
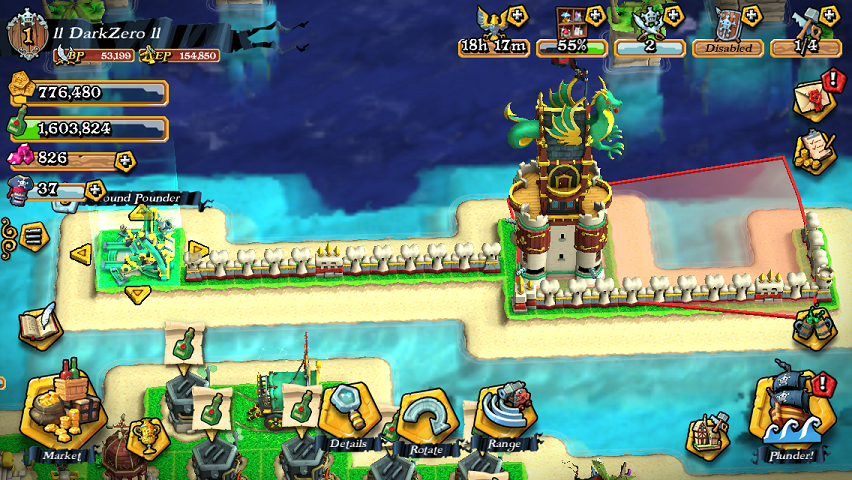
There are 3 defenses you need to check when you see a Pirate Hall on the outside but near the main part of the village. The first and most important is the Ground Pounder. There are several layouts that make it look like the Pirate Hall is on the outside and an easy snipe however if you look further back in the base you may see the Ground Pounder aimed directly at it. The Pirate Hall is put there as bait because of the high Hit Points and is used to slow down enemy troops while the Ground Pounder fires from afar. At levels 1 and 2 the GP has an attack range of 12-24 tiles. You don’t want to attack it head on, you must utilize attack angles and make sure your units will start attacking the structure from the sides, away from the target zone.
(The Wall pieces in the pictures are used as references for tile spaces and range)
The strategy that most players use for Chest Farming is dropping their Pirate Rank to 1 and searching for exposed Pirate Halls, the further away from defenses the better. (Note: There are some players that VEHEMENTLY oppose intentionally Rank dropping. I am not one of them). The matchmaking is fixed according to your own Pirate Hall level so you will only be matched with those that are 2 levels lower than yours or 3 levels higher. Gone are the days when you could pick on the brand new PH1’s.
Exposing your Pirate Hall is also a good way to protect your loot when farming as Chest Farmers will most likely just snipe your PH and not attack your village. This gives you a free Shield and you also keep your loot. However, if you have a lot of loot up for grab and an easy village to raid, some players will still go in and try to steal your resources. Usually though a nice Chest Farmer will see you first and give you a Shield.
The primary objective for Chest Farming is dropping as few units as possible to reduce wait times while getting at least 1 Star, usually from an exposed Pirate Hall. Dropping 1 or 2 Gunners is preferred however it depends on the Gunners level, if they’re lower you may need to drop 3 or more Gunners so you can destroy the Pirate Hall in time.
Sometimes the Pirate Hall isn’t nicely tucked away in a corner but it’s on the outside of the defenses. This is why most Pirate Hall sniping involves using Gunners, you want to be able to out-range the defenses that are near there. Gunners Range can be Maxed out (5) at Tier 5 in the Academy.
There are 3 defenses you need to check when you see a Pirate Hall on the outside but near the main part of the village. The first and most important is the Ground Pounder. There are several layouts that make it look like the Pirate Hall is on the outside and an easy snipe however if you look further back in the base you may see the Ground Pounder aimed directly at it. The Pirate Hall is put there as bait because of the high Hit Points and is used to slow down enemy troops while the Ground Pounder fires from afar. At levels 1 and 2 the GP has an attack range of 12-24 tiles. You don’t want to attack it head on, you must utilize attack angles and make sure your units will start attacking the structure from the sides, away from the target zone.
(The Wall pieces in the pictures are used as references for tile spaces and range)
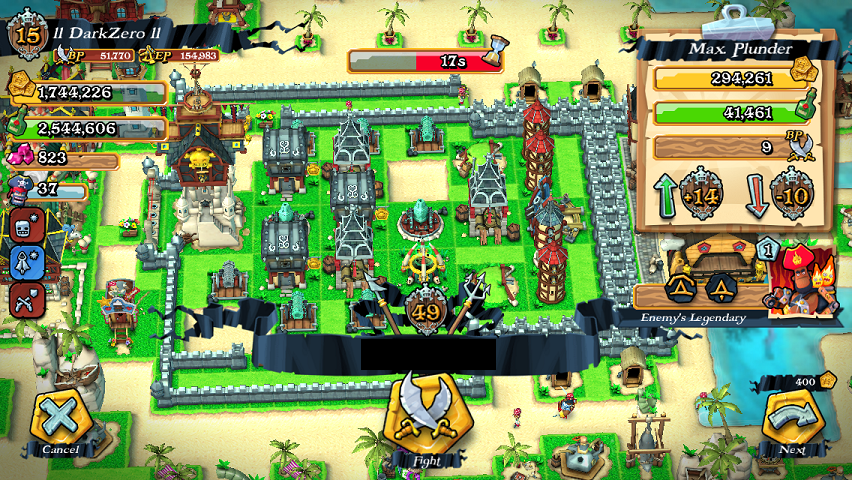
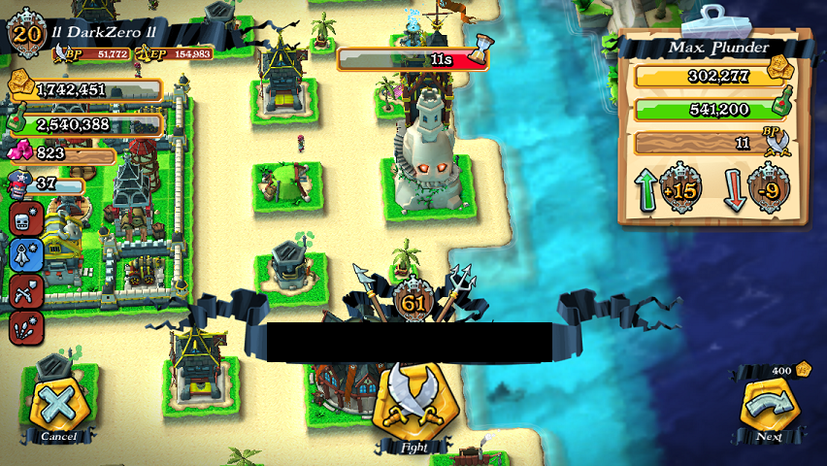
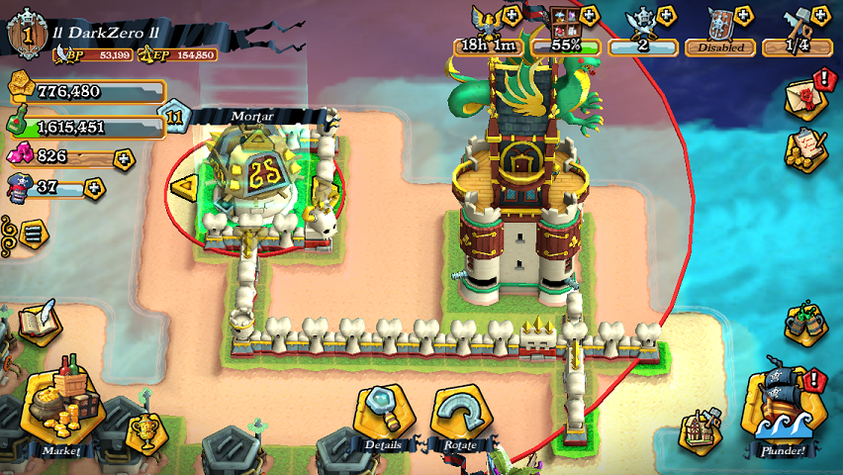
Standard example, the Ground Pounder is directly behind the Pirate Hall with a 12 space difference. However, there is also a Mortar behind the PH preventing you from easily attacking from a corner away from the GP’s range so this would not be an easy 2 Gunner drop.
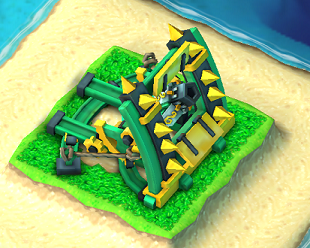
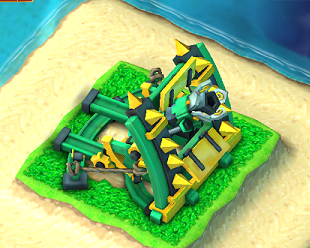
The level 3 GP can be set to either Short or Long range. The Long Range is the same as level 1 and 2 but the Short range setting is 4-14 tiles. You can check to see what they’re set to before you start a raid by looking at the barrel. On the Short range the barrel is rescinded and the outer flower covering is tucked back. On the Long Range the barrel is protruding and the flower is covering the end.
Ground Pounder set to Short Range Ground Pounder set to Long Range
Ground Pounder set to Short Range Ground Pounder set to Long Range
|
|
If you see the GP is set to Short range and more than 6 tiles behind the PH, you can attack head on and stay out of the range.
The second defense you must look for are Bunkers. They have an 11 tile range and are similar to the GP in that they are likely to be found aiming at the PH from behind or from the sides.
The second defense you must look for are Bunkers. They have an 11 tile range and are similar to the GP in that they are likely to be found aiming at the PH from behind or from the sides.
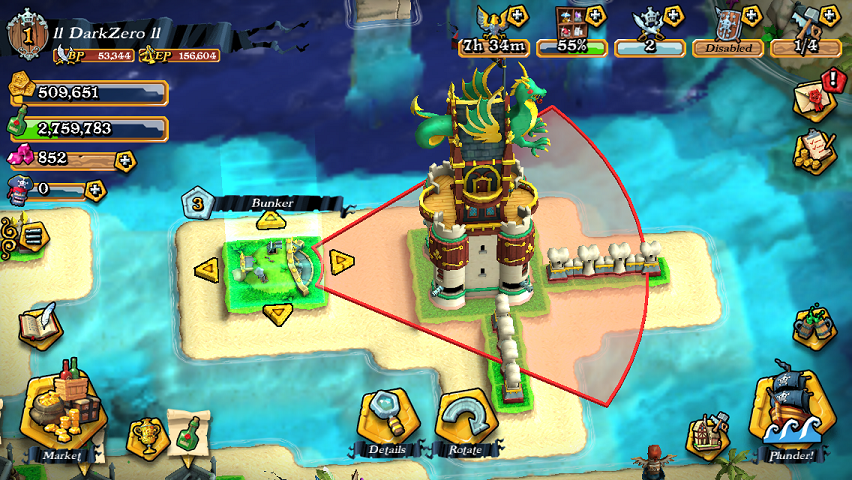
What you want to do for an easy 2 Gunner drop is attack at an angle that puts you within range of the Pirate Hall but outside of the target area. As you can see below, there is only a 9 tile distance between the Bunker and the furthest land spot available when dropping on the East side (If you look closely you can see the skeleton of a Gunner I dropped to verify). The 2 Gunners to the South are able to take down the Pirate Hall without being in range of the Bunker.

Here’s what the target area looked like. As you can see, Gunners were able to out-range the Bunkers view from the side. If the Bunker is more than 3 tiles behind the Pirate Hall and aimed directly at it, you can safely attack towards the front of the Bunker.
The third and least commonly seen situation is the Mortar next to the Pirate Hall or somewhat close to it.
The Mortar has a maximum range of 12 tiles all around it and as you can you Gunners will not be able to outrange it if you try to attack from below.
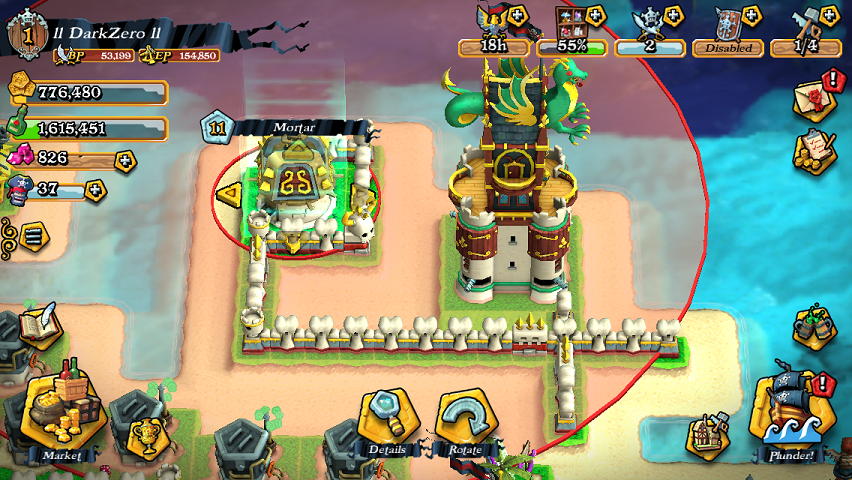
If the Mortar was placed one more tile backward (And assuming there was more ground to stand on the East side) you could out-range it and take down the Pirate Hall with a 2 Gunner drop.
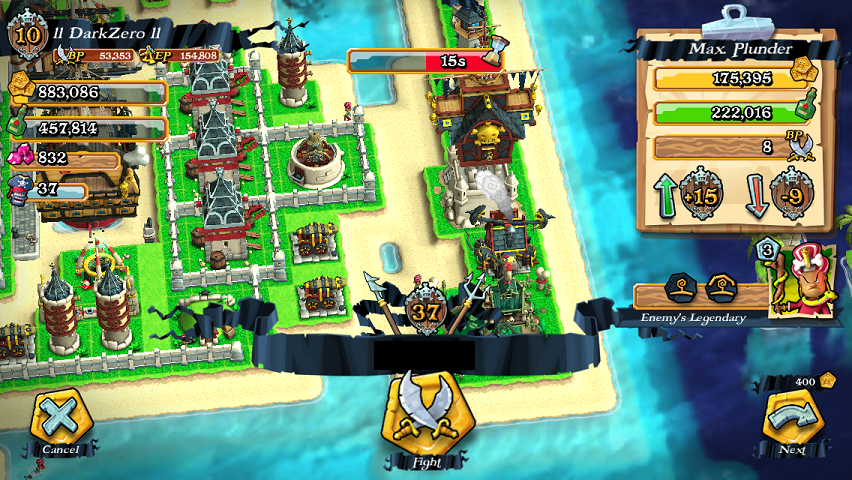
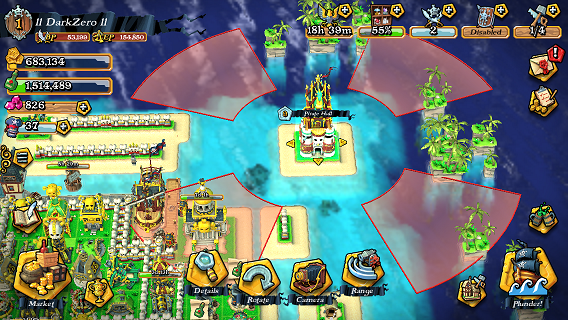
Another "defense" you have to look at for is Pirate Hall level 9. There are 4 cannons located on the corners of the building itself and like a level 3 Ground Pounder, they can be set to either Long or Short Range. You can visibly tell before the attack what they’re set to. On Long range setting, the cannons appear up top and there are wooden sleeves at the base of the towers. For sniping PH9’s this is preferred since there is a huge area right next it where you can’t be hit.
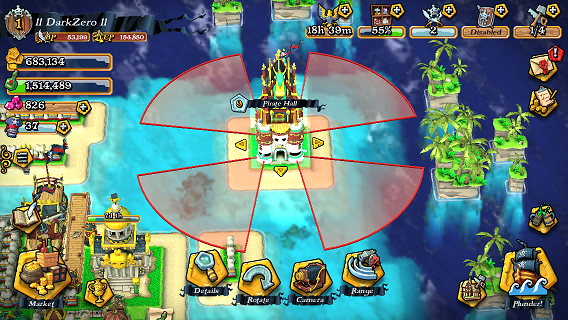
On the Short range setting, the cannons are at the bottom and the wooden sleeves are at the top. This makes it more difficult successfully using a 2 Gunner drop as you have to make sure they attack directly towards the middle of each side to avoid the target areas. If there are other buildings around or before the PH, you must figure out what position to drop your Gunners so they will path safely towards the middle instead of the edges.
Now you can always deploy more troops and take down the exposed Pirate Hall in the above examples rather easily, I was just giving tips on what to look out for and trying to use only a 2 Gunner drop.
